
Manage your business workflow with PowerApps / Microsoft Flow (Using Dropbox for reporting)

Microsoft released a new product back in December 1 2015 called “PowerApps” as a preview.
PowerApps allows you to easily create mobile and tablet apps by connecting to various sets of data such as Excel and Dynamics CRM but not only Microsoft based systems. It also can access to Google Drive and Dropbox.
The concept of the product is not requiring you to need to know the programming language but to use an Excel-like equations to develop an app.
As of April 24 2016, PowerApps is still a preview and you can see how to receive an invitation from this article.
In this article, I will be using PowerApps to automate the process of approvals for weekly reports that I submit inside Dropbox. You will need an Office 365 (or Exchange Online) and a Dropbox account for setting up. Other processes are all handled by PowerApps.
First sign in to the web version of the PowerApps (https://web.powerapps.com/)

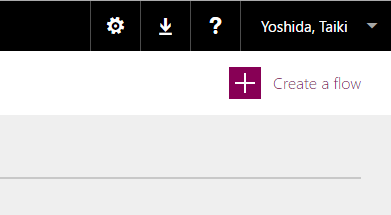
Once signed in, click on “Flows” in the top left corner.

Click on “Create a flow”
There are many examples shown but we will be using “Collect Feedback on Dropbox” for this demo.
As shown in the diagram, this demo shows a flow where if some file is uploaded on to Dropbox, an approval request is sent via email. Once approved or disapproved, a reply mail is sent.

If you select it, a “Create a new flow” screen is shown with multiple requests for authentication.
First,go to the drop down menu for Office 365 Outlook and select “+Add New Connection”.

Click on “Sign in to Office 365 Outlook”

Enter the login details you normally use for Office 365 and click on “Sign in”.
You need to also sign in to Dropbox when authentication for Dropbox is shown.

Once complete, click on “Continue”.

Now you can choose which folder within Dropbox you would like to monitor for file uploads. Next to the “Specify a folder”, click on “…”

Contents of the Dropbox folder is shown. Click on “>” to look into the sub-folders. Once you click on the folder to monitor, click on “Choose” to confirm your choice.

Next, we will setup the approval request email.
Fill in the “Subject”. You can also use variable wordings such as file name by selecting from options below.
In the “User Options”, specify the messages the user will be selecting for decision. The decisions need to be separated with commas.
Specify the “To” field as well.

In the “Condition” window, you need to specify what is the “positive result” that should be dealt with.
The example below shows the Selected Option with a resulting Value that is equal to “Approve”.

Next, you specify the actions on when the condition is met and when it was not met.
Below is showing an action for sending an email is set in both approved and declined cases.

Finally, fill-in the “Flow name” of this workflow and click on “Done” to save the flow.

If the result is like below, you have successfully created a workflow on PowerApps

So now, I’m going to try out the workflow.
First, I will upload my weekly report word document into Dropbox.

Now it’s uploaded.

Looking inside Outlook, I see that an approval request email has been delivered to me. (The approver)
The details of the workflow is in the subject, and my two options which I had set are shown as buttons.
I will click on approve this time.

And now, you see that a new email is received for the person who requested the workflow.


Leave a Reply